Tuesday, December 9, 2014

A Return to Purple: Assembly Progress....lack of bases

So made some progress last night on my three new crew boxes I'll be adding to my Neverborn from yesteryears.

Zoraida, new Lilith, and Pandora boxes are assembled, as well as Miss Ery, Tuco, and Black Blood Shaman. Need to just assemble one of the regular plastic teddies. Some notes on assembly of these crew boxes.


First of all, the plastic models are absolutely amazing sculpts, no argument there. Out of the three I recently assembled though, I was surprised that the newest one (Zoraida) was so complex. Some of the decisions on where to split the model just seemed weird, but I'm not a sculptor/modeler so take that for what its worth. Each silurid had a separate tongue which wasn't terribly difficult to deal with but was something to take care of. Also the silurid standing on the rock had a very thin left leg making it a challenge to get it to stand nicely.


Now I love the pose, so maybe the frustration was worth it. So my main complaint with this box is that a lot of the key contact points (legs/arms) really could have benefited from more notched joins. Its just odd that some had them while others did not. Overall, though I am quite happy with all of these boxes and really can't say they were that difficult. The Bad Juju model is stunning and is the main reason I bought the box, but know I'll get a lot of good use out of Silurids in the upcoming year.

Zoraida herself was interesting, her dress is similar to the female Illuminated model. She goes together pretty easily, but all of her voodoo dolls (while cool) took extra time to get put on the model. Speaking of, the actual voodoo doll model has some super thing plastic areas which look like they will probably break off with excessive use.

For now I am awaiting on the Secret Weapon Blasted Wetlands bases to arrive. I am doing these three boxes on these wetlands and Lucius is based on DragonForge Lost Empires already. I forget what Lynch is on since he has been built and based for over a year and a half.

Dragonforge 30mm Lost Empire

Secret Weapon 30mm Blasted Wetlands

Thanks to some friends on Google Hangouts who pointed me to the actual secret weapon video showing ideas on making getting the bases all water-effect fancy.


So looks like I have a lot of work ahead of me, but I think this is a good challenge for me in the hobby area, since its something I've never done before. I have most of the materials already just need to track down some water effects liquid from the hobby store.

Monday, December 8, 2014

Played 2 Missions of Firestorm: Planetfall...

Yesterday Jerico and I sat down to learn Firestorm: Planetfall. I have been in love with the models ever since Jeremy first posted up the news about em way back. I held off just knowing there'd be a ton out there to play. Disclaimer, this was a learning game, anything below could be wrong and incomplete since we were playing through the starter box. Also, just random impressions throughout this, but thought some may be interested.

So the first mission is a simple move and occupy, no opposing forces. These intro games are played on a 2'x2' and each gets larger.

Now I've been told that its is standard Spartan Games ruleset with some obvious caveats, differences, and unique rules, but for me it was my first time playing a Spartan Game so it was all new to me. Its the exploding 6 dice, etc. so I won't go into that.

As far as occupying a building can be done with infantry units and once they're inside they are hard to dislodge, especially if you get up close (see Close Quarters Combat below). This is one of the main ways to score points in the game, grabbing and controlling objectives. A secondary way to score is for every squad you kill of your opponents (as they have points associated with them).

So the second mission is where we got to see the Directorate (me) face off against the Aquan Prime (Jerico). This was fun. Victory is obtained by getting your planetfall (forget name) tracker down to zero. We started at 12, this is done as I mentioned before by killing squads, but more importantly by controlling victory point scoring buildings (there was one). Besides having infantry occupy to control you can have entire squad that has the "Track & Hold" ability (like my scout buggy).

Think it took about 5 turns to get the game to a finish point. It was quite close, but once my infantry got in the building it was just time that i needed to really win. We did identify that tanks should not try and move up on a building to shoot for any real reason (at least the units we used). As you would expect its best for the tank to sit back and just blast the building. The reason for this is one of my favorite parts of planetfall....Close Quarters Combat (CQC).

CQC is sort of reminiscent of ARO in Infinity. Basically if a squad ends a move within 4" of an enemy squad the chance for CQC occurs. The attacker decides first if he/she will CQC, then the defender. This is great because, like Infinity ARO, it keeps both players involved and you both feel like you're really doing something even though it isn't your turn. Then each squad rolls their unmodified CQC die (different stat) for their entire squad and starts reporting damages. In this case, during CQC attacks, squads don't get to use their shields to defend so the damage can help turn the tide before the main ordinance attack which is about to come. This is also why its bad for a tank to move up to a building which is occupied and try and take out infantry because it gives them free shots.

So after both sides complete CQC and casualties are removed (closest ones to squad first), the main ordinance attack occurs. This is where a vehicles/troops main weapon is fired. You can do things like focus (if you haven't moved) or consolidated shot where all vehicles in the squad fire at an enemy (which some reduction in dice pools but still helpful when a bunch of buggies are trying to take out a tank).

Anyways, I know this is long, but its random thoughts from the game. Loved it a bunch. Here are some photos I took before the game.


Friday, December 5, 2014

Live Free or Die Cheating 2015 Malifaux Event

This is the 2nd annual "Live Free or Die Cheating" Malifaux event. This will be a Gaining Grounds 2015 event held on May 2nd, 2015.
This year we are trying something different, as the event will be held at a private hall. Milly's Tavern, in Manchester, New Hampshire. If we can sell at least 24 tickets. Otherwise it will be held at the Game Castle, like last year.
By reserving and buying this ticket you are guaranteeing a spot at the event which includes the following (regardless of location):
  • 1 ticket for enterance to the event
  • 1 Lunch time meal
  • 1 on-site cash-bar (only if at Milly's Tavern)
Note: A portion of your ticket fee will go towards charity (to be decided) and to prize support.
Reserve your spot today!
This event is NON-REFUNDABLE due to the deposit required on the location.

Monday, December 1, 2014

A Return to Purple: Neverborn is the new Rezzers in 2015

A Return To Purple

This is the start of what I plan to be the coverage of my journey back to purple. I'll be playing Neverborn in 2015. For me, it is a return to where I started. Lilith was my first master back in Malifaux 1st Edition. While I still plan to use my old metal models, and some new-to-me metal models I picked up with the recent price reduction on Wyrd's old stock. I am really focusing on the 4 plastic boxes I have with other stuff sprinkled in.

I have already assembled and primed and played a few games with Lucius (you won't see them in the list below as I've already assembled and based them). I will be building new plastic Lilith, Pandora, and Zoraida boxes. I am looking forward to this in fact. Initially, I felt overwhelmed that I'd be able to build all of these, and get them on the table with color. I even went as far to have a quote done on getting them commission painted and decided, I'd just challenge myself with painting them all myself.

What I'm listing here is all of the stuff I plan on using for my 2015 Neverborn year that needs to get assembled, primed, and painted. I will be putting just about all of these on swamp bases from Secret Weapon miniatures. I may have missed some, but at least this is as complete of a list that I can think of right now. It comes to 18 30mm bases, 5 40mm bases, 5 50mm bases. Stay tuned as I'll try and post things up as I go both from a modeling and a gameplay perspective. As always, listen to Joe and I on Cheated Fates Radio.

Monday, June 30, 2014

ToMB - End-of-June, Sonnia Criid (Dave's)

Hi,
I've been working on the Sonnia Criid Avatar piece.  I'm really pleased with it.  The hair still needs doing, but it's getting close to finished.  Thought you'd enjoy.  I hope to finish it by the next posting.

Dave

Tuesday, June 17, 2014

Tale of Malifaux Bloggers: Molly and her Students

School is in session. For this months ToMB (May/June) I present one of the larger purchases for a Molly crew. In this month's purchase we take a look at the University of Transmortis box set. This box came out about 11-12 months ago, in 2013. It was a highly anticipated product at the time as it was our first chance to physically see what a Malifaux 2E stat card was made out of.  It also shipped with a number of M2E specific story missions.


There is a helpful review that decomposes the students (see what I did there) over at GMort_Chaotica's blog. If you're looking for great unboxing/reviews take a look at his stuff, its quite informative. One word of caution, when looking at the stat cards keep in mind that these cards are no longer legal stat cards. Even though they are M2E, they went through a re-work during the Wave2 open beta Wyrd ran at the beginning of 2014. This was done in order to bring their abilities/stats more in line with what M2E Wave 1 and Wave 2 models ended up being. This is understandable since this box went to print well before M2E was done. Make sure to grab them over at the Wyrd site before they go away when Wave 2 book/cards become available (that's when they'll be removed from the site; low-res, hi-res).

The models are all Iron Zombies and can be used in the story encounters (some of the rules are a little weird, but for a good 'ol fun game they're worth giving a try; there is also a 1-player mission). The rulebook for the story encounters comes with the box.

The box retails for $40, so we will be using the $14.51 + $25 from this month, so I'm short $0.49 which I'm just going to borrow from next month. I will have $24.51 for next month.  The following models/stat cards come in this box:

  • The Valedictorian
  • Student of Sinew
  • Student of Steel
  • Student of Viscera


Ok so on to the models, first off they're stunning. These are some of the most amazing and beautiful models Wyrd has produced. The Valedictorian is of course my favorite model, but all are in a league of their own, really showing what the transition to plastics has enabled from a modeling perspective.

I have had these fellas primed for about 9 months, and they are on the painting table, but other models are taking their slots in the queue for now. I'm hoping to get to them in the next month or so. Stay tuned for some painted Iron Zombies next month hopefully.

Before we jump into what each model does, let's review why they're good in a Molly crew and specifically why I use them in my crews. The simplest answer is that 3 of the 4 models can be summoned by Molly when taking the Forgotten Life upgrade card because they are Horror minions. The beauty of this is that each of the iron zombies / students are tailored to combat (exploit) specific model traits/characteristics.

All the iron zombies also have Flurry, which can be pre-loaded by using Molly's (0) Whispers of Future Flesh to have them move before activating and then when they activate they are in position to use their Flurry. All of the iron zombies also have Armor +1 as well as the Hard to Wound +1 and a (0) Lecture Notes to remove the ability for a model to take triggers. This is great against models with Squee or other triggers allowing them to move away.

So from a summoning standpoint you can summon the right model for the right job against the right enemy models. For a quick recap on what Molly can summon with this upgrade here are the card requirements to summon certain models (notice the students).


The student of Sinew and Steel require the same 11 crow that a Punk Zombie does but the Student of Viscera needs a 12 crow. The Sinew and Steel variants have the same stat lines but differ in that sinew is better suited against undead models, while steel is better suited against constructs. They have terrifying which targets undead/constructs, ignore hard to wound/armor and have triggers gaining ++ to damage flips against undead/constructs.

So lets take a quick look at the other models:

Valedictorian

  • Key Remarks: 
    • Henchman - Access to using soul stones to mitigate damage, valid Bodyguard and Entourage candidate (due to mobility from flight, armor, and hard to wound)
    • 50mm base - This is often over looked but can really help. This coupled with the 3" Ml attack. Meaning getting and keeping models in engagement range is a little easier. Add in Unnerving Aura or Decaying Aura and she can put the hurt on. This also makes her a great model to help carry out Deliver a Message against an enemy master since she can get there and engage early to take the action next turn (or be moved by Molly/Necrotic Machine)
    • Overall she is pretty resilient, and for 10ss a great Henchman to use in various situations. Give her a try and you'll be happy you did, just remember like any other model in Malifaux she has a specific purpose and should hired and used in specific roles

Student of Viscera

  • Key Remarks:
    • Slither - This ability alone makes this model worth the 12 crow needed to summon. Slither allows for a 9" movement (not a push) ignoring severe terrain. After moving the model can take a (1) Ml action. It is basically an alternative to a charge action. The charge of this model is 6" and because its a charge would suffer penalties due to terrain; so thats a 8" threat range. With (2) Slither the model gets 11" threat range. Now just remember if you summon this model you'll want to either remove the Slow condition (with someone like Chiaki or Johan) so it can use this ability the turn it is summoned
    • 50mm base - As mentioned above this allows for a larger range of models it can hit. Just remember if summoned it can't take interact actions the turn it summons in. But a 50mm base model with 2" Ml attack doing 2/3/5 is pretty slick.
So that's it for this month. A quick overview of the models and why I think they're great for Horror Molly. Let me know how you fair with them.

Monday, June 16, 2014

ToMB - Mid-June, Sonnia Criid (Dave's)

Hi,
It’s mid-June now.  This month has been productive in the modeling side of things, but I haven't bought anything and I only got one game in.  I do however have pictures for you.  It’s a work in progress, but I’m very pleased with how the Sonnia Criid Avatar piece is working out. I’m layering paint on it to simulate the fire, first the white primer, then GW Sunburst Yellow, then GW Fire Dragon Bright (Orange), then a watered down Vallejo Orange Fire, and coming up will be GW Blood Red, Privateer Press Skorne Red (a darker red), and then a uniform dark grey from Vallejo (not sure which one yet).  Only the yellow touches the white, only the orange goes on the yellow, etc...I'm trying to build up the effect of the fire as a large glowing force.  Fire goes from white to black as it cools.  I even painted the backside of Sonnia a uniform gray before painting the browns and other colors to add contrast to the brightness portrayed in the model.  So, like I said it’s a work in progress, but at minimum I'm enjoying the project immensely.  

Also in the picture, the Witchling Handler is on the right side, she is not a finished product yet either.  Her hair and jewelry flair needs painting.  I haven't decided on colors and thus haven't painted them yet. The model on the left is Sonnia Criid from the basic metal set.  She’s finished, although not shown, I really like what I did with her sword flame pattern on the backside.  Maybe next time I'll show that.

In the next picture, I have the Executioner.  The Executioner I finished.  Given my unhappiness with the graphic nature of the severed hands I replaced them with green stuff.  The two hands are now a loaf of bread and a turtle shell (lunch) hanging from his belt instead.  Here’s the finished product.

Hope you enjoyed them.

Dave

Friday, June 13, 2014

Tale of Malifaux Bloggers: Molly Update Delays

This update is for April and should have been posted on May 17th.

Wow and Sorry, is all I can say at this point. Things have been hectic as of late and I missed all of May as far as an update to my Molly ToMB progress for the month of April.

The good news...I've been playing Molly still, so she continues to be my main master the past few months. Besides her, I've been playing a little Tara down in VA with +Aaron Darland, which was an amazingly fun game. Also, played some Molly against +matthew m against his Dreamer crew. Both really close games which I lost by 1 measly point. I've also been running events and prepping for events:


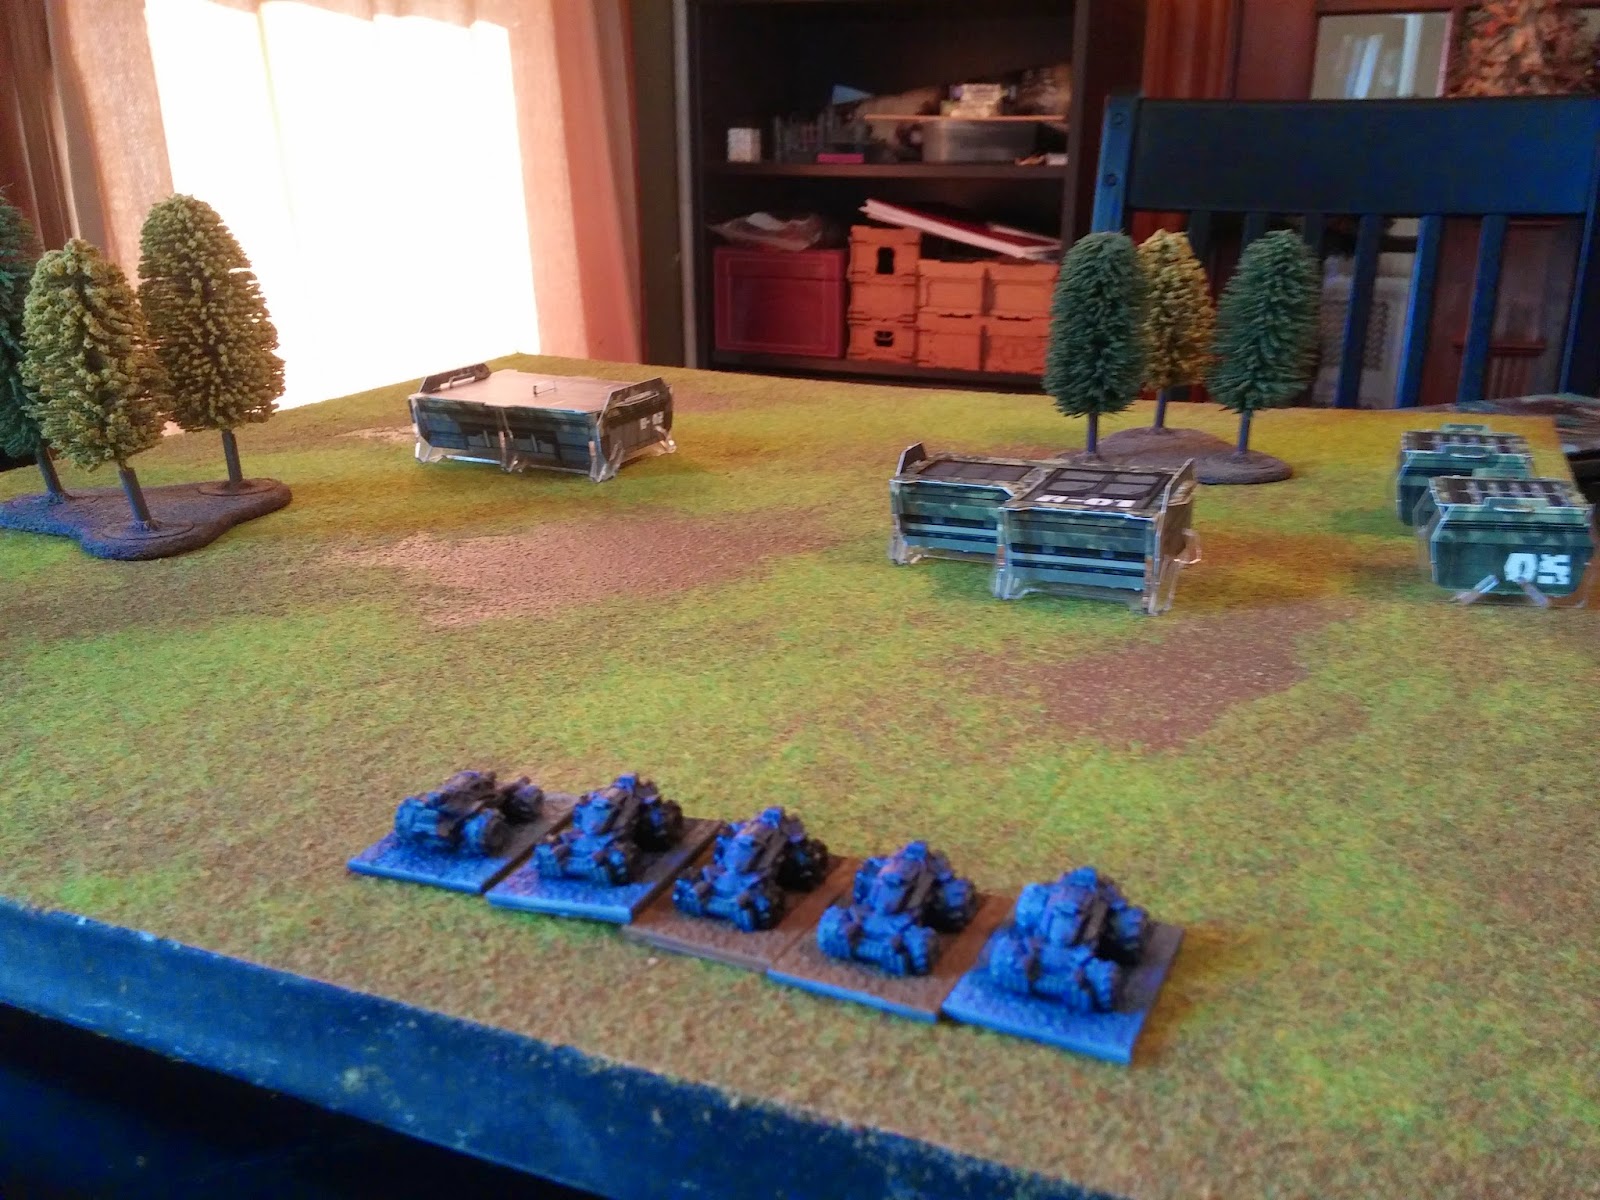
As far as painting progress, I've made none! Yup after my Adepticon painting blitz I just couldn't get the energy. I did assemble a fair amount of terrain from my Renaissance Miniatures KS delivery of the East Asian terrain (which is stunning).

Ok so what did I buy for May? Well as I stated for April, it was going to be the Punk Zombies. Oh boy, yeah these are amazing. I have finally mastered what I simply call the "PZ Bomb", the amount of damage this thing can deal out is amazing. The other day in a two player game I coupled it with the Valedictorian + 2 Punk Zombies dropped in between a Guild line with stunning results. I'll go into more specifics in a moment on how/what it specifically is.

$-wise I have $4.51 left over from last months Beta + Necrotic Machine purchases giving me a total of $29.51 for this month. The new Punk Zombie plastics have been released in May, but I have the old metals. Here is a cost breakdown for those tracking costs (both come with 3 zombies):
 
  • Metal Punk Zombies - $15
  • Plastic Punk Zombies - $21

I ended up purchasing the Nicodem box for myself since it comes with 3 of the new Punk Zombies and he is the only Ressurectionist master I do not own. However, I'm using the cost of the old metals for cost tracking. So at the end of May that leaves me $14.51 left over, but wanted to make sure newer players see all the options for purchasing the Punk Zombies available (as a note there is one other valid Wyrd Punk Zombie model, it is the Judge from the rare, hard to find Undead Lady Justice Nightmare Edition box from Gencon 2011). I'll be saving the $14.51 for next month.


Ok, so let's go over why the Punk Zombies are so great in the Molly crew. First of all they are horror minions so benefit from her ability to reactivate them, and they can be summoned by her. Along with the necrotic machine's (0) Brethren they can be pushed 4" towards the necrotic machine. The punk zombies also gain Black Blood while within 6" of Molly which is stellar. Now punk zombies are fantastic models alone, but with all of Molly's abilities from taking her upgrade Forgotten Life they just go over the top. When summoned in they must be placed within 6", so gain Black Blood and loose all of their wounds minus how many enemy models they're standing near. The key to summoning a Punk Zombie in with Molly is that you really want it to be near 2+ models so it can take advantage of its Hard to Kill. If not than don't summon a Punk Zombie in, it is a waste to do so unless near 2+ enemy models for this reason.

When Molly summons anything in she forces every enemy model within 3" to suffer 1 wound if it fails a Wp 15 duel. This is nice and helps deplete your opponents hand, but isn't the main source of damage. Now ideally its nice to get two Punk Zombies down here, but really isn't necessary, it just increases the damage output. The reason is that the Punk Zombies, if placed in a position to get max benefit, can use their Slice & Dice. Now be careful with this as it does 3 dmg to ALL models within (Aura 3") who fail a Df 13 duel, meaning it can hit your own models. But come on, we're ressers, we can take advantage of this can't we? Oh you bet your decayed eye sockets we can, watch and learn.

Can anyone think of a model that is pretty resilient and can get some really great movement (who may also be a Horror)? How about oh, I dunno the Valedictorian? So you get the Valedictorian into the mix there; within 3" of the PZ. Also, have it within 6" of Molly so it gains Black Blood and then use the Slice & Dice from a Punk Zombie. Of course the Valedictorian will choose to fail and take the damage. It has Armor +1 so it only takes 2 dmg, and as a Henchman you can choose if you want to dmg prevent, but it really isn't necessary. You do want to take at least 1 dmg so you can trigger Black Blood! So let's count it up.

  • 1 dmg from summon to all enemy within 3"
  • 3 dmg to every model within 3" from Slide & Dice
  • 1 dmg from Black Blood to every model without black blood within 1"
That's around 5+/- dmg to all models in the area. Now sure this is all contingent on some duels passing/failing, but you can see the potential I hope. Add in any other mix of more models that can take the slice and dice dmg that can have black blood and your dmg numbers can get pretty high. This also can quickly force your opponent to have to use a lot of cards.

The observant reader may be asking, "how does Slice & Dice action get taken during Molly's turn?". Well its from her (0) Whispers of Future Flesh on her Forgotten Life upgrade I mentioned earlier. This gives any friendly Belle or Horror (within LoS and 10") the chance to take a (1) Action; Slice & Dice is a 1 action. It's also great coupled with her Tear of the Gorgon upgrade to allow her to take two (0) actions. The second I take besides Whispers of Future Flesh before ending her turn is (0) Gorgon's Cry to give her Terrifying (All) 12 until her next Activation. 

We're not done! After Molly is done, she can accomplice, and choose the Punk Zombie she summoned to activate which he will than choose to do Slice & Dice again, potentially handing out 3 more dmg to everything within 3" (and potentially the extra 1" from Black blood on Valedictorian).

So that's the PZ bomb, I've come to really like it and there are obvious variations and I have perfected which are better for certain situations. For example, if you setup some other key things before you drop it you can also make it hard for specific enemy models to pass. Like activating a Dead Doxy and having it give -flip to duels the enemy model is the defender of (via Confusing Feelings trigger from (0) Take the Lead). Also, during Molly's activation, but before dropping a PZ in use her (1) Whispered Secret to give a model -flip on all duels. These combined make it very tough for enemy models to pass the duels required from the summon (Wp 15), and the Slice & Dice (Df 13). 

One quick note if you have the opportunity to put the PZ in a more tactically advantageous position he may just want to use his 2" Ml attack and do some dmg to one model. My main reason for enjoying the Slice & Dice approach is that it really can kill an opponents hand (and their models). 

So that's all for my incredibly late update which was due May 17th. I'll be ready for the next one coming up June 17th. Any guesses what I'll be buying? I already used it here in this update; I'm a dirty Cheater at ToMB!


Thursday, May 22, 2014

ToMB - Mid-May, Sonnia Criid (Dave's)

Hi,
It’s mid-May and in the last month I have only made one purchase for Malifaux to add to Sonnia’s crew, a Guild Executioner.  I found that I would like to have a brute, a damage soaker, to control the center of the board.  My attempts to do that with Sam Hopkins, Witchling Stalkers, or the Witchling Handler resulted in unfavorable, but fun results.  I believe the Executioner will help with this.  To go with the Executioner I bought some 40 mm bases from Secret Weapon Miniatures, the Trench works ones.  They’ll match the theme I have for the rest of the minis, which also have the trench work bases.  In the near future, I will want to apply some green stuff to the model.  The mini has a pair of severed hands dangling from his belt, which kind of breaks my rule/desire to have miniatures I’m ok with showing to my kids.  I intend to make them into pouches, should be simple enough.

In other modeling news I made a little bit more progress with the Sonnia Crid avatar and the Witchling Handler, but they still need more paint.

In game playing, I missed a big tournament in New England for Malifaux, held at the Game Castle in Londonderry, NH.  I had other plans that conflicted, however I did get to play 3-4 times this past month.  Once was even a 4-player game that was great.  I got crushed, but the story was good and I’ll get to it in a minute. 

My friend Mike, an avid player/collector of Malifaux, keeps bringing different crews against me, some guy with a top hat and mechanical spider-things, someone Pandora with a bunch of ghosts, someone with a bunch of rats, and some ugly lady in a swamp.  Obviously I pay great attention to the details such as names and techniques so I can master it later, not.  Nah, we play fun games and enjoy the event.  I make slight variations to my list of Sonnia, but it remains similar for now as I learn more about the schemes and strategies.  Some work well and others are disasters. 


In the 4-player game we started in corners, with a hidden desire to get to a set campfire for extra victory points.  The game quickly became 2 games of 1 on 1 for the first few turns since we ended up wanting the opposing person’s campfire. I ended up clashing with some Resurrectionist who kept taking bone corpse counters to summon more opponents.  I used the 1 point skill to allow Sonnia to create Witchling Stalkers from dead opponents.  It was a crazy battle, I started with 7 figures and had 14 die and 1 survive the game! My main opponent of this game had 15 die, unfortunately there were more.  It was a great story and a great game.  I’ve never seen a Malifaux game turn into such a blood bath. Combined we had 9 die and 6 get created on Turn 3 alone. Anyway, I recommend trying the multi-player scenarios or making some up.  

Take care.
-Dave

Thursday, April 17, 2014

ToMB - Mid-April - Sonnia Criid (Dave's)

Hello Folks,

I wanted to update you all on my activities in the past month in modeling and game playing in regards to Malifaux.  Now I haven’t been as productive this month with Malifaux for many reasons you probably don’t care about, but I have purchased or previously purchased the Sonnia Criid Avatar and the Witchling Handler.  Both are currently assembled.  I’ve been taking care with the Sonnia Criid centerpiece, removing mold lines and green stuffing the cracks. A picture is included of the model during my green stuffing.  Since then I’ve primed the model white and have begun to prime the backside of Sonnia as black to hint at a less illuminated backside.  In addition I’ve been trying out on some excess GW and Confrontation Orc Heads different attempts to make their eyes look like they are on fire.  I have a favorite, but I’m still experimenting so I’ll hold off saying what has won. 
            For the Witchling Handler, I have primed it black and have begun to paint it.  It’s not finished, but I’m content with the progress.  Sorry, no picture.

            For gaming, I think I’ve played one game of Malifaux versus my friend Mike.  I substituted in the Witchling Handler for the 2 Guild Hounds and Samuel Hopkins’s armor from the Guild Arsenal Deck.  It was my first play with her.  She did well, put a little fear into Mike, but in the end I believe she died on the field.  Technically I lost 5-3 on victory points, but I had changed my normal tactics and ignored/forgot the strategy card objective (quarters), costing me objectives and ultimately the game.  Instead I did a bum’s rush up the middle going after his caster for the assassinate objective.  I got him, but with Sonnia’s fireballs.  My charge up the middle failed to reach him, but resulted in much entertainment as it faltered in a bottled-up charge across a stone bridge.  Great game.  Talk to you some more later in on, family Easter dinner is at our house this year and I got some cleaning to do.

Thursday, April 10, 2014

Tale of Malifaux Bloggers (ToMB) March - Molly Purchases

The month of March has been an exciting month. Its the beginning of April and I just returned from Adepticon in Lombard, IL where I had a blast playing in the Cake match, Team Tournament, and Masters of Malifaux. This post is going to focus more on what I've learned the past 4 weeks playing with Molly. I've played a fair amount of games with her now, and have pretty much solidified how I am going to be playing her at the 50ss level. So what I'll introduce is my second months purchase, with some forethought on where I see her crew being by the end of ToMB.

Last month I had $1.01 left over, meaning I have $26.01, which puts me JUST shy of what I'd like to buy for this month, which is a necrotic machine and a punk zombie boxset. The old necrotic machine is $12 and the old 3 pack of punk zomibes is $15, so I'm $0.99 short. 

Since May we'll be seeing the release of the new plastic punk zombies ($21), I'll wait. For March I decided it's important for a Molly player to grab a necrotic machine and Bete Noire. Yup, that's right I said it, Bete Noire.

She is a viable entry in just about every crew and serves a fantastic role in so many situations being a staple in your Resurrectionists repertoire. Typically, I'd suggest saving the money for the punk zombies next month plus something else, but I think this is a good time to get another heavy beater.

She can help you accomplish some important schemes and strategies. She has 2 releases sculpts and a new plastic sculpt prepared to be released this summer, so you will have options with which model fits your tastes.

Original Bete Noire - $9.50
Bete Noire Alternate - $13.50
Bete Noire Plastic - $11.00

So I already have the original bete noire, which I will use for my cost putting me at $9.50 + $12.00 = $21.50. Leaving me $4.51 for next month. 


So let's first discuss the necrotic machine. This little guy may not appear to be anything useful, but it is a nice little totem who can be summoned. At 2ss, the only reason I could see hiring him with the crew is because you feel like you're going to get out activated early game. Otherwise, its best to summon him. Even so, I need to emphasis I have no plans to hire him. If you're looking for activation control I guess you could spend the 2ss, activate him to move up his double walk. Move your models with his (0) action. Then have Molly summon another one and have it activate and move your models up more. If anyone has another reason to hire him, enlighten me. He can be summoned 10" from Molly or her regular 6" and this is how I typically plan to use him.

I prefer the 6" summon, but when I need it the 10" summon is nice because it forces you're enemy to have to deal with him before dealing with Molly if you lose initiative and plan to summon a bunch of stuff. Now the necrotic machine is no slouch either, as it provides the ability to get a last push of belles, horrors, and spirits within range before a turn end. It's attack Ml is base 5Crow, but if you get lucky it does have a 1/1/6 dmg spread and some interesting triggers, most notably Infectious Fluid which has a way of potentially handing out paralyzed (especially if you opponent has no cards left). Again nothing fantastic, but just a little something to turn the tide if you get lucky and something to remember. 

With bete, you can use her in multiple ways. Having her pop out when one of your crooligans or other living/undead models die is great. You just need to ensure you unbury Bete Noire out near the model you want to kill because her movement isn't great. 

I enjoy unnerving or decaying aura on her. Usually its Decaying Aura, especially if Assassinate is on the list of schemes. Bete is pretty straight forward, with some solid Df of 7, and a paired attack (+ on attack flips). I enjoy her paralyze trigger as it is quite effective at shutting down just about any master. Now she has very low wounds so you'll want to keep a 10+ in your hand, because once she 'dies' she can take the "One with the Night" action for free and attempt to bury. If you can keep a 10+ in your hand the only thing that can cause her to fail this is a black joker. So as you can imagine a black joker and a 10+ is pretty powerful for you to hold if you're using Bete Noire. 

The other way to use her is have her unbury, kill something with 1 AP, and then choose to take the (1) One with the Night action to re-bury setting up for next turn. Again somewhat circumstantial but an option one should consider when fielding bete. With Molly she becomes incredibly mobile.

So I want to wrap this post up but I do expect to post a short writeup about using Molly at Adepticon before the end of this month. I used her for three games and find her to be incredibly powerful. Stay tuned for that. It won't be focused completely on ToMB as I threw in some other models, but it will be a glimpse of where I see her fleshing out to by the end of this ToMB journey! Until next time.

Wednesday, March 19, 2014

ToMB - March - Steel and Blood

Last month, I forgot to give you what I spent in my budget. So if you go back to my previous post, you can see what I spent in the month of February.

However, we're in March now and some fun stuff has happened since my last update. Adam ran a wonderful 35ss fixed list tournament (Fixed list, by the way, means that you show up with one list that is predetermined before the tournament; contrary to the Malifaux rules that state crews are determined before each game). My list for the tournament included:

  • Viktoria of Ashes
    • Upgrades: Sisters in Spirit
      • I chose this to give the wonderful teleport ability that the Viktorias are so famous for.
  • Viktoria of Blood
    • Upgrades: Oathkeeper
      • My main idea for this was to give her an extra AP when it counted, however that ended up being a waste of soulstones.
  • Taelor
    • Upgrades: Scramble
      • I'm not sure why you would take anything other than this on Taelor. The stat bonuses it provides on top of making her unimpeded seems to be a prime tool to help her slay summoned beasts.
  • Ronin x 2
  • Student of Conflict
  • 6 ss cache
Now, I have really only dabbled in Malifaux before this tournament. Adam showed my fiance and I a few games at TempleCon, but this was my first experience playing Malifaux with people who.. play a lot of Malifaux. My apologizes for the lack of photos here, I was so focused on the games I kind of forgot to take photos. Also because I'm a terrible slacker and should have posted this back in February, I don't remember every single detail of these matches.

ROUND ONE: Viktoria vs Lilith
This game was certainly a learning experience, as I believe we were the first game to finish. The Strategy was Turf War with Close deployment. The schemes I ended up choosing were Bodyguard (Taelor as the model needing protecting) and Outflank

Lesson Learned: If you don't know how your opponent's crew plays, the easiest thing is to run up and stick a sword in them

I would have done so much better this game if I had taken that approach. However, I play a lot of games like League of Legends where if you don't know what your opponent can do it's better to just avoid them and focus on farming. This mindset does not work in Malifaux.

I quickly learned that Nekima is a tough cookie. My opponent immediately rushed Taelor knowing that she can put a hurt on things and pretty much killed her turn 1. The Viks proceeded to march up the center to get into position with the Ronin to work the strategy since Taelor was now a victim of Black Blood. The next few turns resulted in some Ronin dying to Nekima and Terror tots and the Viks netting me 1 victory point for being near the center. My opponent ended up taking the game 6 to 1 when we finished.

ROUND TWO: Viktoria vs Perdita 
This game was a lot of work for the win I ended up getting. The strategy here was Reconnoiter with Flank Deployment. My schemes ended up being Line in the Sand (revealed) and Spring the Trap. 

Lesson Learned: Remember your schemes.

This game was nerve wracking a bit. Everything I've read about the Viks is to play smart around ranged crews. However, taking my lesson from the previous game; the best plan was to run up and stab some members of the Guild.

I did my best to keep to my schemes. Knowing that Line in the Sand would net me the most points; I tried to step my crew in the best possible places for scheme markers. Perdita thought it best to compel the Ronin and keep picking up my scheme markers. The game wasn't too bloody (In the end I think Papa Loco and a single Ronin were among the dead). We also made a few mistakes (They're detailed here.), but in the end the Viktorias were uh.. victorious? I ended up successfully pulling off line in the sand by removing Papa Loco and getting Vik of Ashes on the center line; completing that scheme.

Where I failed with the schemes involved one of my Ronin engaging Perdita. I could have used her to finish Spring the trap, however I failed to do it. In the end, I won with 3 victory points.

ROUND THREE: Viktoria vs Lady Justice

I think this game I felt the most comfortable. That could have had a lot to do with my opponent being a close friend, but I also felt I was getting more comfortable with the game itself. The strategy was Stake a Claim with Standard deployment. My schemes were Line in the Sand and Plant Explosives.

Lesson Learned: Make sure you understand the Strategy

Lady J took some early ground to try to distract me from the strategy. It worked, since I spent pretty much my first turn killing her. This allowed her crew to get some early Claim markers out without any sort of disruption. We later learned that Claim markers cannot be within 6" of another claim marker, so I would have spent more time trying to take ground from him. I was able to nab 2 victory points by completing Plant Explosives and eventually a 3rd from the scheme. However, Lady J's crew had already gained too much ground on me and I wasn't able to close the gap.

It was ultimately a great time and I learned a lot! Thank you again Adam for putting this on.

I did play another team game recently, but let's save that for another post ;)

Hobby Time:

Well I haven't finished painted my crew. So much has been going on in my personal life that I have not had much time for painting. I did finish one of my Ronin however. I'll get a picture up of her on my next post. 

Total Cost:

So for March, I only added one model. This model is pretty much THE model to get for the Viktorias. Say hello to Viktoria of Ashes' real sister: Vanessa!

Vanessa seems to shore up a weak point in the Hired Sword Box; their lack of healing. I'll have her put together this month and we'll have a picture as well.

The Running Tally:
Hired Swords Malifaux Second Edition box Set: $45.00
Vanessa, Treasure Hunter: $11.00

This leaves me with $44.00 at this point in March with the new 25 dollars for the month of march and the left overs from February.
I recently made another purchase, but I thought about saving it for April. Guess we'll have to see ;).

As usual, I'd love to hear any feedback anyone would like to provide! Be safe in Malifaux!


Friday, March 14, 2014

ToMB - Mid-March - Sonnia Criid (Dave's)

Hello Folks,
I wanted to talk to you a little bit about why I play Malifaux.  With literally hundreds of miniature game choices out there, why do I choose Malifaux amongst all the others?  For me, Malifaux meets all the criteria of a good game.  1) It’s easy to find a game with people you enjoy playing games with, 2) the cost for entry is relatively cheap, 3) it fills a nitch, 4) ease of rules and/or ease in mastering the rules, 5)  it has tactical complexity that makes you want to come back, and 6) specific game rules don’t leave you frustrated or give you angst.

Malifaux, 40K, War-Ma/Hordes, and Infinity all fit number one.  Other games I like that don’t fill #1 include Confrontation, Dreadball, and Blood Bowl.  The locals here play Blood Bowl online instead.

For #2, 40K is out, entry is over $100 before you buy models, but both Infinity and Malifaux are skirmish games with low initial costs.  End cost may not be low, but the amount needed to start playing is low.

For #3, by nitch I mean they meet a type of game.  I split miniature games into 4 types of nitches, Sports, Sci-Fi, Fantasy, and Other.  Sports include Blood Bowl (I own 3 teams) and Dreadball (6 teams).  Sci-Fi includes Infinity (2 armies), 40K (2 armies), and the likes of Firestorm Armada (3+ fleets).  Fantasy includes WFB (1), War-Ma-Hordes (0), Malifaux (1 crew), and Confrontation (3+).  Others are all the rest, like Wild West Exodus (0), and Dystopian Wars (1).  My nitch for Fantasy had a need.  I love Confrontation, but the players I know don’t live in NH, so that’s not enough playing time to justify the effort.  Also it’s getting difficult to get miniatures.  I recently sold/traded away my Warmachine Cygnar, and ½ my WFB Orcs and Goblins.  Malifaux is my replacement to Confrontation and my go to game for the Fantasy nitch.

For #4, 2E rules are easy to comprehend.  Granted the local henchman is a great teacher, but the game has an ease to it.

For #5, the skirmish game isn’t a get’em game, it’s schemes and strategies appeal to me.  The variety makes it enjoyable.  Playing a game where the job is to kill the opponent’s pieces gets old faster than something with scenarios.

For #6, unlike War Machine with the rules as written allowing a model to go in-between 2 models with a slightly bigger than a hair’s width gap, I found myself not interested in playing War Machine.  With Infinity, one model can do all the moves while all the others cower and provide actions to the super model.  These rules burn me on a game.  I haven’t seen a rule that burns me in Malifaux yet.

So, I play Malifaux because of ease, price, convenience, variety, and lack of angst, that’s all.

--

On other notes, I ordered the Sonnia Criid avatar model with the flame dragon coming screaming out of her mouth, so cool.  I’ve wanted this model for months to paint not necessarily to play with, it’s that cool.  And I also got a 50mm base for a total with the avatar of  $45.  I only had $23 in credit for the price, so in effect this cost me February and March’s plus up.  I have a $1 left until mid-April, I think, if I’m counting the bases into the cost, $26 if I’m not, however I am.


 Dave

Wednesday, March 5, 2014

ToMB Perdita: First Games

Time for my first impressions of the Latigo Posse. Note that these were three games, all part of the same tournament that was fixed list.

I would like also thank my buddy Mike for lending me his Perdita crew and congratulate him on winning the tournament with his Ramos crew.

The Crew

Perdita
Francisco
Enslaved Nephlim
Santiago
Nino
Papa Loco

Cache: 5ss

Total Soulstones: 35

Initial Thoughts

Taking the base crew without upgrades gave me a great disadvantage. A lot of what makes Perdita good are her upgrades. I'll go into more detail on upgrades in a later post. That way I can focus on the synergies and tactics that the base box brings.

A lot of what makes the Ortegas great are their abilities. Know their abilities, more so than other crews the Ortegas hinge on abilities and activations. With Papa Loco a nearby ally is gaining positives to damage and with Francisco positives to defenses as long as the target is within 2 inches. 

Onward to the games!

Perdita VS Nicodem:

The streets were empty as Santiago and Francisco turned to look around the corner. A vulture overhead the only break in the silence. "Get down," yelled Francisco as a dead body fell from the carrion bird's claws. Where the body had fell now stood a crazed man, hollowed faced and carrying two blood stained swords. 

On instinct Francisco pulled out his sword, slicing the walking corpse's head clean off. "Easy," he said made to sheath his blade. "Watch out!" shouted Santiago, his peacebringers aimed at his brother. In a second the felled corpse was up again, Francisco matching it strike for strike, "Run, hermano!" 

Strategy:
Turf War

Scheme Pool:
Take Prisoner, Breakthrough, Outflank, Bodyguard

My Schemes:
Bodyguard(Santiago) (0 VP)
Outflank (0 VP)

Opponent Schemes:
Outflank (2 VP)
Line in the sand (2 VP)

Ending Score:
2/5
Perdita Loss

This match up was my first match up against Nicodem, the setup was perfect for Turf War. Close deployment and on my side of the table there was a three inch high wall that was within 6" of the center of the board. Perdita and Papa Loco sat behind it out of sight for 2 turns. It helped a lot because there was a Rotten Belle luring my other models out of cover.

The biggest obstacle came from Nicodem's summoning. I'm told its very hard to pull off, but my opponent had the resources he needed. A Punk Zombie was able to get within 3 inches of Santiago, Francisco, and Enslaved Nephlim allowing pulse Slice and Dice*. After I killed it, Nicodem resurrected it from its corpse counter and with upgrades allowed it to reactivate without the slow penalty from being summoned. The advice I've been getting is to take a Freikorps Specialist, since it can destroy corpse markers that are near it. Its a good hard counter, but an Outcast model.

The schemes were hard to achieve, especially when I forgot to deploy on both sides of the table to get Outflank, instead staying mostly center. Santiago was in a rough place when the Punk Zombie hit him with flurry, Hard to Kill kept him from dying. If it got to turn 4 I might have gotten a single VP for Bodyguard, but with time constraints we got to turn 3. Take Prisoner with the Punk Zombie could have guaranteed me more reliable VP in theory.

*Slice and Dice - Those within 3 inches must pass a Df test or take damage.

Perdita VS The Viks:

Francisco walked into the quiet graveyard, his brothers and sister waiting on the other side of the gate. A shadow flickered past the corner of his eye, but all that stood before him was a still statue. "I could have sworn-" Bang! The silhouette of a statue-esque woman appeared from behind one of the tombs, gun and sword drawn. Gripping his shoulder, Francisco retreated behind the gate, "Damn mercenary," his palm was red. He could just make out his sister in the distance another assailant already upon her.

The scantily clad woman ran head long at Perdita, her sword at the Ortega's throat. A small smile formed across Perdita's face and within a second the Ronin was grappled. Two shots rang out, and two bodies fell to the ground, Perdita holstering her gun. Francisco picked himself up, "You have to show me how you did that."
The Grave Yard

Strategy:
Reconnoiter

Scheme Pool:
Assassinate, Spring the Trap, Make Them Suffer, Distract

My Schemes:
Make Them Suffer(1 VP)
Assassinate(0 VP)

Opponent Schemes:
Line in the Sand, Revealed(3 VP)
Unknown(0 VP)

Ending Score:
2/4
Perdita Loss

This game was tough for me, I have only ever played Reconnoiter once before and didn't realize that models 6" from the center meant that the model didn't count as scoring. Neither of us realized this. I probably should have had Nino in one of the corner edges, instead I placed him in the middle of the map.

Also I forgot that enemy models couldn't take interact actions near Nino because of his Spotter ability.Might have stopped my opponent from getting line in the sand.

Nino on Top of a Tower. Not as useful as you'd think with Reconnoiter.
I wouldn't suggest taking Make Them Suffer against Ronin, they have Hard to Kill meaning you should kill them before they can activate again. Their Seppuku action allows them to sacrifice a ronin for soulstones, but denying precious VP.

Flank Deployment definitely favored shooting more than melee. The Viks didn't get into melee with any of my models except for two. Obey might have done better giving my own crew exttra actions instead of pulling his models closer to me. I don't find Enslaved Nephlim very useful, mainly because I just end up moving and using his influence to maybe do something if I'm lucky. I wish there was a good tactical action he could use.

Perdita vs Seamus:

Nino had gotten to close, his brothers and sister were still preparing when he slipped out. The Neverborn they had been tracking had made a detour through the red light district. Nino was just about to call out to his family when he saw her. Standing there playing with her parasol, was that giggling he heard? No, it was laughter... manic laughter. 

"It's the Hatter!" yelled Nino, repeater already winding up. There was a bang and flash as Nino fell to the ground. From the shadows stood Seamus, grin on his face and smoke trailing from his gun.


In one more activation Seamus would be dead. Impossible to Kill? Peacebringer ftw.
Strategy:
Stake a Claim

Scheme Pool:
Murder Protege, Assassinate, Plant Explosives, Bodyguard

My Schemes:
Line in the Sand Revealed (1 VP)
Plant Explosives(2 VP)

Opponent Schemes:
Murder Protege (0 VP)
Body Guard(2 VP)

Ending Score:
4/2
Perdita Win

Stake a Claim would have been probably better if it was close deployment, anything else is too far away. Mostly because it will take a Perdita crew a lot of movement to get to the other side of the table. The suggestions I get involve using Obey and Influence to push models up the board. However, with Nino in the crew I should use his From the Shadows to deploy on the opponent's side to drop a claim marker turn one.


I was surprised that I killed Seamus turn 2. Sadly I didn't take Assassination, if I did my final score would have probably been 5 VP.

Special Note: For Rezzer players who use Belles in Stake a Claim, make sure not to use Lure too many times as it helps the opponent get closer to your side of the board.

Final Thoughts

So far I'd say these three games were me getting the feel for the Ortegas. I didn't utilize abilities as well as I should. Over used Perdita's Obey, wasting soulstones and high cards. Didn't take utilize Nino's from the Shadows effectively. And lastly didn't take any upgrades.

Freikorps Specialist is not going to be on my buy list for March. I would have to buy the Outcast arsenal deck and Freikorps Specialist, too much investment just to counter summoning crews. I'm not liking Enslaved Neplim too much so you might not see him in too many future posts.

Next post will be focusing on Perdita VS Ramos game I had as well as my purchases for March. Please let me know down at the bottom what you think and leave any suggestions or questions.

@DontEatRawHagis on Twitter.

ToMB - Early March - Sonnia Criid (Dave's)

Hello Folks,

I wanted to blog a bit about the recent Malifaux tournament we had here in balmy Manchester, NH.  We had 10 people play in a 35 stone quasi-newbie tournament, organized by one of our local expert henchmen Adam.  It was a 3 round 75 minutes per round tournament.  The tournament as a whole was a friendly set of games, not a competitive struggle to determine the best.  There were prizes, but Adam’s wife baked a cake, and that really was prize enough for all. 

I fielded the Guild Faction, led by Sonnia Criid.  With her I brought Sam Hopkins with some extra armor, 2 Guild Hounds, 3 Witchling Stalkers, and 5 soul stones.  Sonnia had the 1 stone power to make more Witchling Stalkers as well, but I consistently forgot to use the power (5 times) throughout all 3 games and therefore will not speak of this card again… I have a tendency of doing this, so I might need a neon sign or large gold star to remind me of the power I kept forgetting, such as I’ve used in other games.  Or maybe I’ll bury this Guild Arsenal Card.

My default strategy was to use the Guild Hounds to run across the board and leave tokens wherever the schemes or strategies required.   The Witchling Stalkers would start burning opponents with pistols and later engage them in melee.  Sam would effectively block for Sonnia so Sonnia’s magical explosions could go off many many times.

To summarize, I had 3 great games and enjoyed each and every one of them.  I played good people, 1 new and 2 old friends.  I ended up in 4th place, much to my surprise with 1 win, 1 loss, and 1 tie.

My first game was with new friend Ed’s Resurrectionists, led by the Seamus model.  We tied 4-4.  I don’t remember all the details, but I got points for Outflank and Breakthrough, thank you Guild Hounds.  He got his for capturing Sam Hopkins and the center objective.  The Resurrectionist crew I saw today would have been one of the crews I would be uncomfortable with my children seeing on the painting table.  Rotten Belles aka undead hookers I not ready to explain.

My second game was with friend Jerico’s Guild led by the Lady Justice model.  I won 4-3.  Surprisingly Lady Justice melee’d with Sonnia and Sam for most of the game.  Sonnia actually fared well against Lady Justice in melee.  That surprised me.  In the end, I played the scenarios a little bit luckier than Jerico.  He however could have tied by leaving a few tokens instead of charging on the last turn, which we discussed during the competition.  He stuck with his plan of charging instead and flipped cards unluckly.  Jerico’s crew for the most part would have been decent enough for the painting table, except the scales of justice model.


My third game was with friend Mike’s Arcanists led by the Ramos model.  I lost 3-6.  Mike and I have played often, of my 8 games of Malifaux thus far, 4 have been against Mike and 3 against this specific Ramos crew.  Mike is an avid player/collector of Malifaux so his familiarity with my crew and having battled previously, meant he dominated the game for the most part.  I changed my strategy pre-game since it appeared he was prepared for my default strategy. So instead of minimizing combat I changed to kill them all, but it was to no avail.  I went for Kill the Protégé instead of schemes of place tokens to win.  He had brought 2 big henchman, I had 1.  He had numbers, armor, and regeneration too.  I never was able to gain control of the ebb and flow of the battle.  It was fun, but my current crew doesn’t have the muscle to overpower another crew.  That’s something to look for a solution in the future.  It ends up Mike went 3-0 and won first place in the tournament. To my surprise if I had won this game I would have won the tournament instead.   I didn't think I played that well.  Guess I was lucky…Until next time.

Monday, March 3, 2014

ToMB Molly: Month 1 Post 2 - A little Tactica!

Introduction

Well there is a lot that I've learned in the past few weeks of playing with my #ToMB crew. I have tried my best to stick to my guns, and have had good success. The only thing that 'put me out of my ToMB' is one summon of a punk zombie! Which means I know where next month's budget is going. Punk Zombies are likely (based on the upgrade "Forgotten Life") in my next month purchase. I want to fit a "Hanged" in, but I'm a few dollars short. The Punk Zombies have Hard to Kill, can be affected by Imbue Vigor (they're minions), and as well all know they just kill things DEAD (Oh plus I can use my NE Dead Justice box Judge model as a Punk Zombie)

Apologies

So before I continue though, I need to apologize for 'reading an upgrade' on-the-air incorrectly. I try and hold my self to a high standard of knowing the rules. I made a mistake in both playing (my first Molly game) and talking about my first Molly game on the podcast. Specifically, I mentioned that I was excited to use "The Philosophy of Uncertainty" on Yin. Well, it makes no sense because getting the trigger to go off puts the ability onto Molly NOT on the target which Molly casts "Whispered Secret" on.

My incorrect tacitca approach was to give some negatives to the model getting "Whispered Secrets" and then knowing that if that model is killed it will be sacrificing the model that killed it. Well this is straight up WRONG!!! My apologies. 

The correct tactica is to use her "Whispered Secrets" on an enemy model to give it the obligatory negative flips on all duels (on success), but the key is that if Molly (i.e. the one who casts this) gets the Tome to succeed on the trigger for "Philosophy of Uncertainty". So, if she is killed by another model, the model which killed it is sacrificed after resolving the current action. So, this makes Molly a less than stellar target to kill, especially coupled with her base ability "Masterful Dead" (Crow trigger on Df/Wp - After this model suffers damage, it may discard two cards to reduce the damage to 1). 

New (experimental) Tactica (i.e. lessons learned)

Ok, so 11+ of crows! Yup that's what Molly wants, any 11+ of crows and she is a happy camper. You can watch some vassalfaux between Joe and me (its mulit-part) to see how we use our respective ToMB crews. This game play isn't representative of how I usually play my masters, but it was an attempt to try something new. So to the point of the 11+ crows, my upgrades have consistently been "Spare Parts", "Terrible Knowledge", and "Forgotten Life" on Molly, and "Pack" on the Rogue Necromancy, and Yin takes "Unnerving Aura". So I'm going to specifically talk about what I tried against Joe due to the Corner Deployment and Reckoning style game. For those new to the game reading this, corner deployment forces more distance between the two players crews giving a little delay to the action.

With 4 corpse counters within 6" and a 11+ crow she can use 2 AP to summon a rogue necromancy in base contact to her. So how would we go about getting these 4 corpse counters. Up front I'd like to state that while this tactic is doable it uses far too many resources. A canine with an 8+ crow can use 2 AP to dig up a corpse marker, now if you get lucky and have 1 of the right cards that's great, but you still need 3 other corpses. So maybe you have 2 8+crows, and utilize Molly's (0) Imbue Vigor to give reactivate to the canine remains (i.e. minion); needing a 9 of rams. Then he can drop a second corpse marker during his reactivate.

Well, that's two. So how do you get two more in a single turn, to reach the 4? You can use Molly's (1) The Ones Left Behind to attempt to summon 2 crooligans, meaning you need two other 8+ crows in your hand. So for those following at home, thats 4 cards of 8+ crows to get 4 corpse markers. The reason the 2 crooligans generate the corpse markers is that they die as soon as summoned since on turn 1 I don't see them being anywhere near enemy models and just die (generating corpses). Ok so that's 2 AP from the canine, another 2 AP (if he gets reactivate), 2 AP from Molly to get 2 more potential corpses and her 0 to do reactivate.

So wow, 5 high cards all with specific suits. Hopefully, now you can see that this isn't the best use of her resources. I think that taking her forward and having things die and taking advantage of the corspes on the table is a better tactic and will be the norm for me going forward. This experiment was just that, to see how well it plays out. Molly has so much in the way of avoiding death that she can be near the fight and survive, between black blood, impossible to wound, masterful dead, and her upgrade to give the trigger philosophy of uncertainty, she is a hard nut to crack.

One lesson learned here, is that sometimes it may be worth summoning a model not near an enemy to see it die and generate her that final corpse marker (assuming you need for her to utilize corpse makers). Again, this is only necessary if she uses Spare Parts upgrade as she really doesn't need corpse markers to do her summoning well. I'm actually going to stop using Spar parts for some time because I see better uses going forward for the cost.

With all of this said, the biggest take away I've had with playing 4 games with Molly is that Soulstones are key for her and that I need to probably drop at least 1 upgrade to give me some more AP at 35ss.

All-Stars

So all-stars in my games have def. been the Crooligans and the Rogue Necro combo. Using their blistering fog to give out +1 damage from blasts the rogue necro can dish out is great. Plus their 'Creepy' to apply -1 Wp to enemy models within 1" is an amazing setup for Yin, other summons by Molly, any Terrifying checks, etc. What is so nice, is that Molly can summon them fairly easily and as long as Make them Suffer and Reckoning aren't the missions they are doing a good job of tar pitting, while killing enemy models with black blood.

Ok, so I need to mention Yin! Simply, because I want him to be my All-star and he just isn't. I mostly think that is because he is expendable AND he gets a big bullseye on his head (I mean that's all that is remaining of his body). He is an absolutely amazing control piece. No doubt, his "No Escape" trigger built into his "The Fear Behind the Eyes" is worth the weight in gold, but his 8 Wd are easily dropped with ~2 AP from any average to moderate heavy hitter. Even with his "Mass of Viscera" which forces negative on attack and damage flips. So with that said, I think he serves an important role in this crew. He forces the enemy to HAVE to deal with him, and during that process the rest of your crew can do what it does best. 

Crew I've Been Fielding

Resurrectionists Crew - 35 - Dustup

Molly Squidpiddge -- 6 Pool
 +Forgotten Life [1]
 +Spare Parts [2]
 +Terrible Knowledge [1]

Canine Remains [4]
Crooligan [4]
Rogue Necromancy [10]
 +Pack [1]
Yin the Penangalan [8]
 +Unnerving Aura [1]

Painting

Finally, I'll leave you with my painting progress for this month. I have to just base the rogue necro and then finish up my crooligans and Yin in the next 2 weeks. Pretty sure I can reach that goal :)